
CarCount
Use the CarCount module for the following use cases:
- "Find jam" — to determine whether traffic is congested on a user-defined road segment.
- "Parking lot full" — to determine whether a parking lot has exceeded its capacity.
Meet CarCount
How It Works
CarCount is built around a convolutional neural network (CNN) trained to detect vehicles. It processes every *n*th frame in the incoming video stream to create annotations (bounding boxes) around detected vehicles and tracks vehicles between processed frames.
CarCount then evaluates the detected vehicles against the event rules, specifically:
- their location within the Region of interest (ROI).
- the number of vehicles within the ROI.
- the time they spend in it.
Based on the result, the platform triggers or ends an event.
Camera and Video Requirements
CarCount performs best under the following conditions:
- Camera mount: fixed cameras only (no PTZ, mobile phone uploads, or drones).
- Resolution: from 1280x720 (HD Ready) to QHD 2592x1944.
- Frame rate: 10–30 fps.
- Object-to-background contrast: at least 20%.
- Tilt: +15° to +75°.
- Pan: −75° to +75°.
- Roll: −5° to +5°.
- Image quality within the region of interest: over 25 px per meter.
- Height: 3–15 meters above ground level.
- Minimum vehicle outline size: 2,025 px (45×45) in standard mode; 256 px (16×16) when the Distant vehicle detection option is enabled.
Computational Capacity
The module’s computational load is rated as average. Actual performance depends on video resolution and CPU specifications.
How to Find a Jam
Traffic congestion at busy intersections or major roadways often requires a real-time response from road police or other authorized agencies.
- Make sure the cameras watching potentially jammed road segments meet the system requirements.
- Enable the CarCount module on those cameras and set it up to detect jams.
- Build an alarm monitor where Cameras = the cameras from item 1, then configure notifications for that monitor.
- When a jam alarm appears in that monitor, review it before responding.
Congestion events can also be relevant during post-incident investigations. In this case:
- On the Events - Additional events screen, checkmark Traffic congestions under the Analytics modules > CarCount and run the search for jams.
- Review each jam event returned by the search.
How to Control a Parking Lot
A parking lot that exceeds capacity typically requires action by security or facilities management. In this case:
- Make sure the camera monitoring the lot meets the system requirements.
- Enable the CarCount module on that camera and set it up to control the lot.
- Build an alarm monitor where Cameras = the cameras from item 1, then configure notifications for that monitor.
- Test the "Parking lot full" alarms arrive correctly on that monitor.
Set Up Jam Detection
Jam detection is the default scenario for CarCount once the module is enabled. However, the geometry and threshold parameters must be defined.
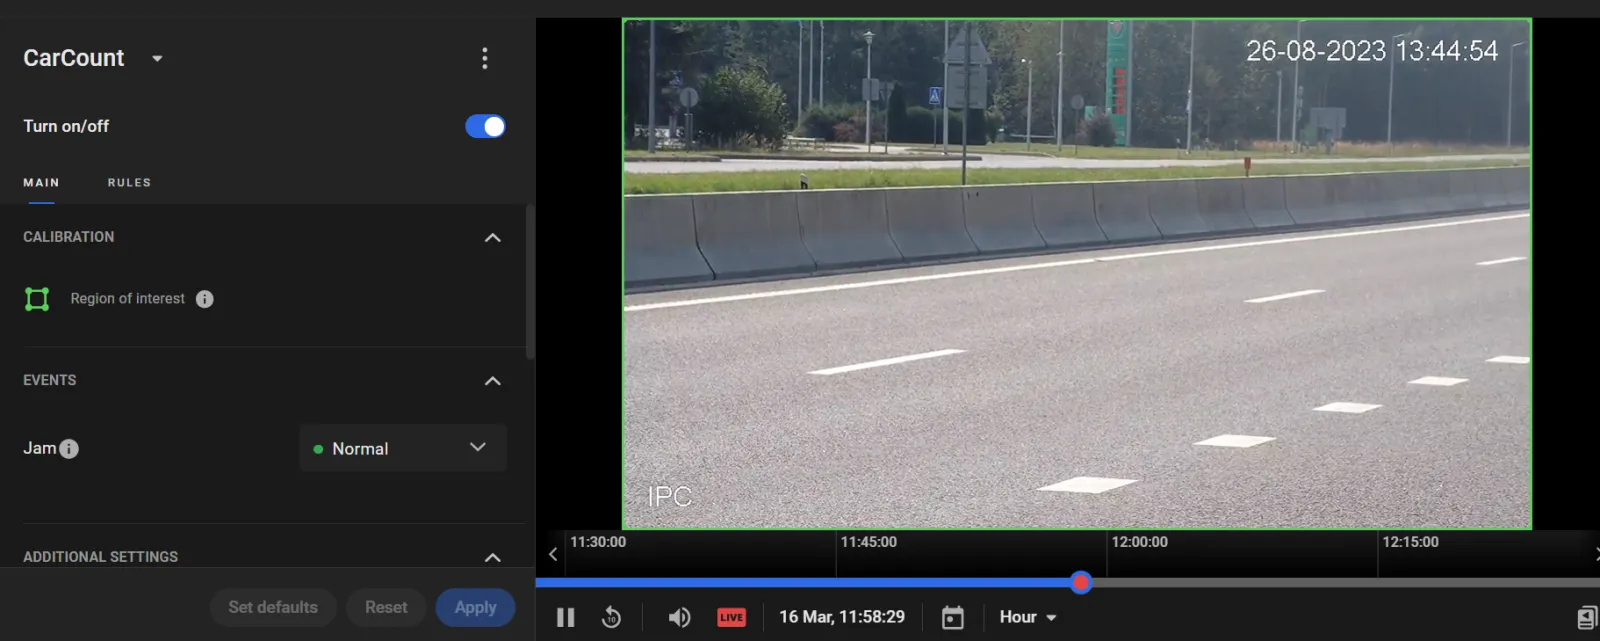
- Under CALIBRATION, define the Region of interest: the part of the frame to analyze. It is outlined in green and defaults to the full frame.
- Under EVENTS, assign a priority rating to Jam events.
- Under ADDITIONAL SETTINGS, define the jam detection thresholds and notification parameters:
- Click Apply.
To move a vertex, hover over it, then drag and drop it.
To delete a vertex, double-click it.
To add a vertex on an edge, double-click the edge at the desired point.
To move the entire region, place the cursor inside it, then drag and drop.
Vehicles in jam: the minimum number of vehicles within the Region of interest required to treat the situation as a jam (integer, 5–40).
Jam if longer than ... s: the minimum duration required to detect a jam: more than Vehicles in jam vehicles remain in the Region of interest longer than this time (integer, 60–300 seconds). This value must be at least three times longer than Recount every ... s to ensure reliable detection.
Recount every ... s: the interval for recounting vehicles to check for a jam (integer, 5–60 seconds). This value must be at least three times shorter than Jam if longer than ... s.
Vehicle in background count: enable detection of objects as small as 16×16 px.
Tips to Review Jams
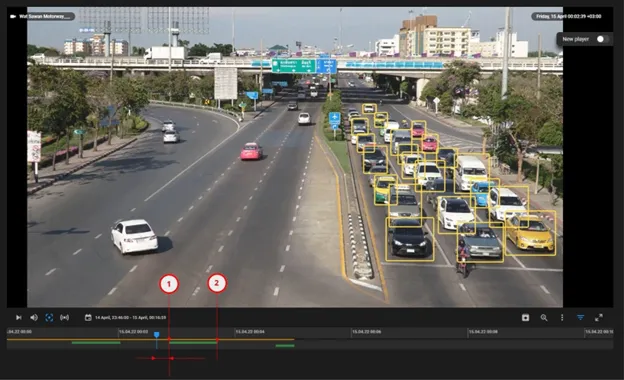
Click a Jam event card on the Events or Alarms screen to play back the event—for example, to confirm whether the congestion is still ongoing, whether it has cleared, and when it started and ended (see 1: jam starts; 2: jam ends). Note that the playback timeline may lag behind the event time on the card due to the Recount every ... s interval.
Set Up Parking Lot Control
Configure parking lot control to compare the current number of vehicles within a user-defined parking area with the number of available parking slots, and receive an alarm when the limit is exceeded.
- On the RULES sub-tab, click Add rule and select Parking control from the menu.
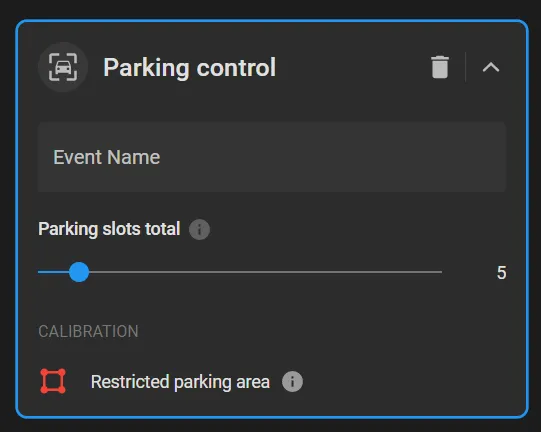
- On the Parking control card, enter a custom rule name.
- Draw the Region of interest to monitor by dragging the default vertices within the frame.
- Enter the total number of parking slots within the Region of interest in Parking slots total.
- Click Apply to send events to the Events screen whenever the number of vehicles in the Region of interest exceeds the Parking slots total limit.
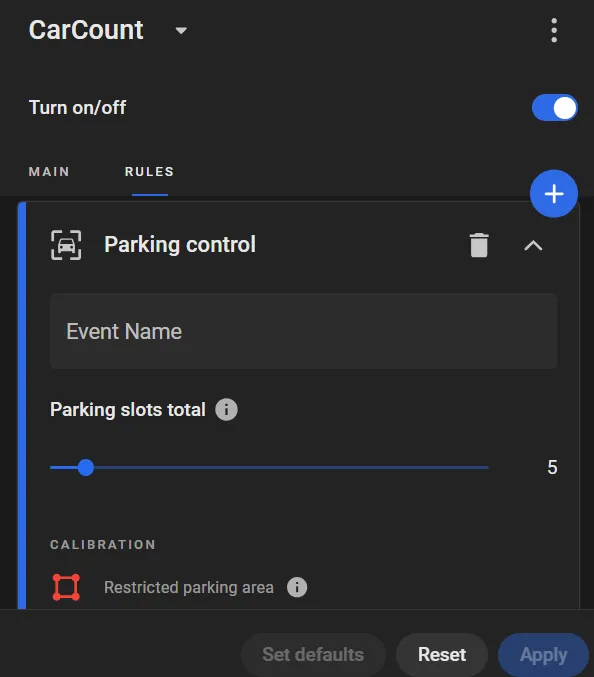
Use a clear, self-explanatory name, because it becomes one of the event names that platform users will work with. Rule names can be edited on the User Menu > Settings > Event Names screen. For example, in this use case, a suitable name would be "Parking full".
Tips to Test Parking Lot Control
- Configure parking lot control on a camera monitoring a real parking lot, but set Parking slots total to an intentionally low value.
- Find "Parking full" events on the Additional Events screen using the event name search.
- Verify in the event snapshots and in the playback that the number of vehicles on the lot exceeds indeed Parking slots total.