
Vehicles
Vehicle Database
Vehicle database content and functionalities are on the Vehicles screen, which opens on running the People in the main menu.
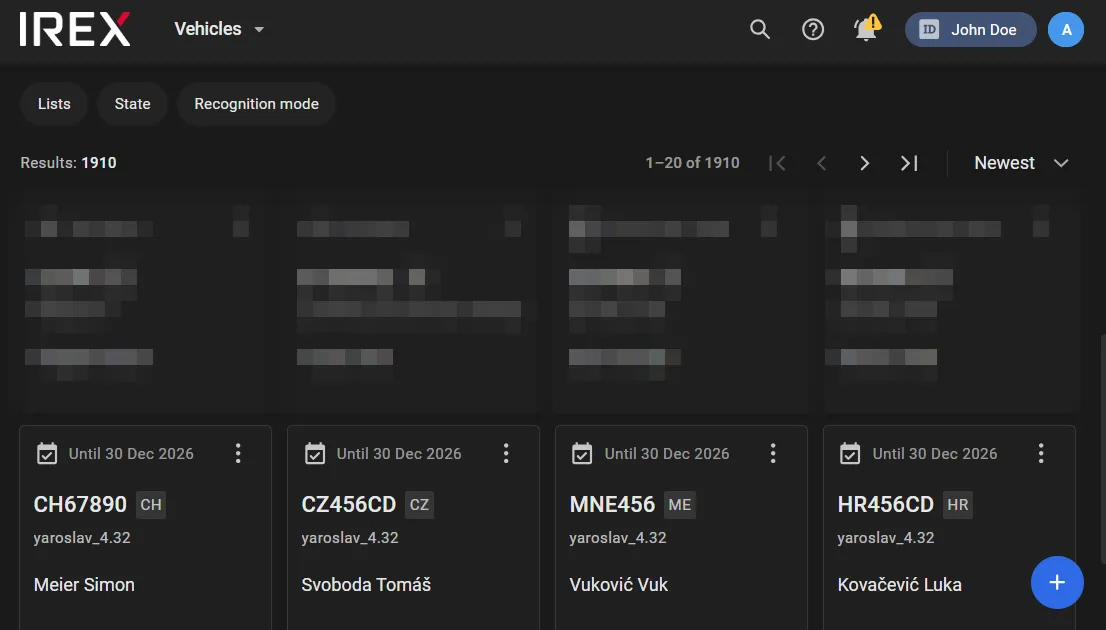
Personal entries in the database are presented as cards, each of which holds:
- Vehicle recognition mode ("Recognize" and validity date, or "Archived")
- License plate number
- Owner's full name
- The vehicle list name that the vehicle belongs to (e.g. “Wanted”).
- Country code.
The vehicle database is maintained using basically the same techniques as the person database. This applies, in particular, to vehicle lists and user groups' access rights to those.
When dealing with the vehicle database, remember that ethical AI principles fully apply not only to biometric data-based identification of people, but to tracking vehicles as well. They are:
- Full transparency
- Narrow constraints for law enforcement
- Cybersecurity & privacy protection
- Permission-driven user interface
- Ethics best practices and checklists
Any managing action with the vehicle database requires a Case ID to be provided.
Manage Vehicle Lists
Managing actions with vehicle lists require a Case ID to be provided!
View and Edit the List of Vehicle Lists
Select the User Menu > Settings > Vehicles to see the list of all vehicle lists in the database.
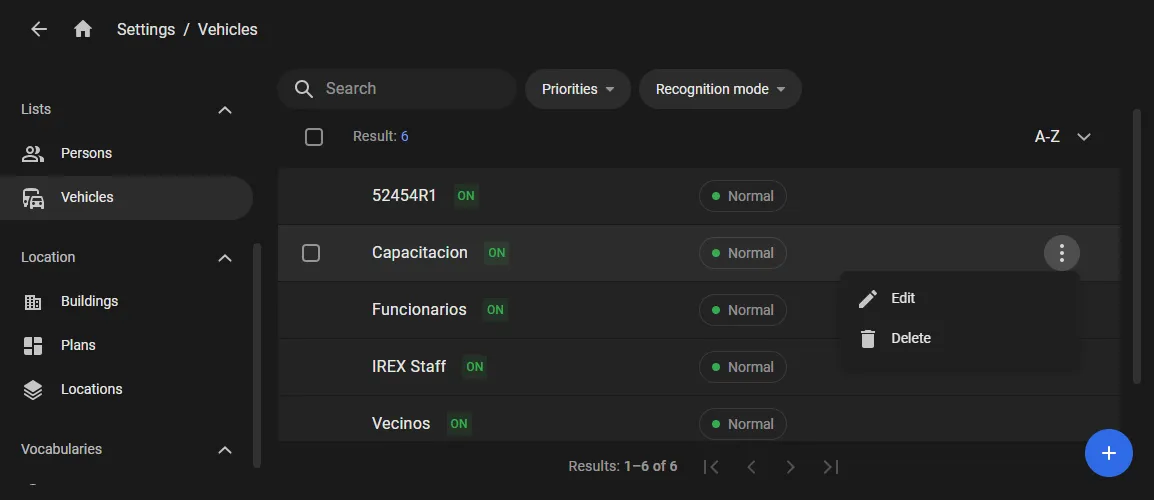
- Click the “+” in the lower-right corner to create a new vehicle list.
- Select the Edit or Delete command in the three-dot menu to edit the metadata of the list (name, etc.) or delete it, respectively.
View, Edit a Vehicle List
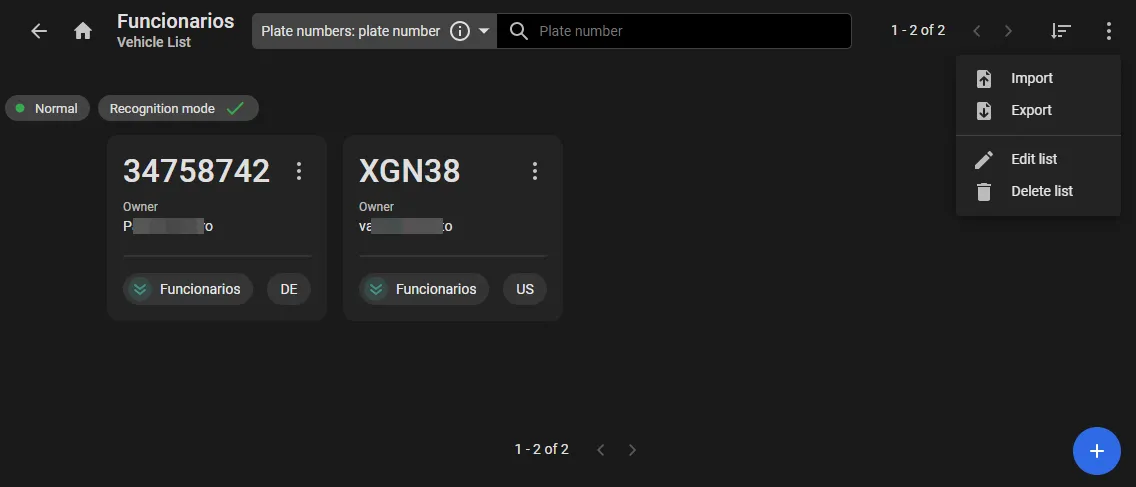
Click the name of a vehicle list on the list — the screen opens, holding the array of vehicle cards.
-
To delete the List itself, click the Delete List on the three-dot menu

- To edit the metadata of the list (name, priorities), click Edit List on the three-dot menu and change those in the window that opens next.
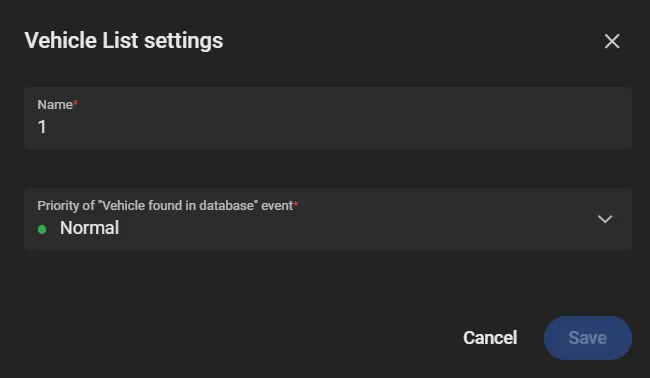
User groups that have access to the list cannot be changed this way; that can only be done in the program settings.
Create a Vehicle List
To create a new vehicle list:
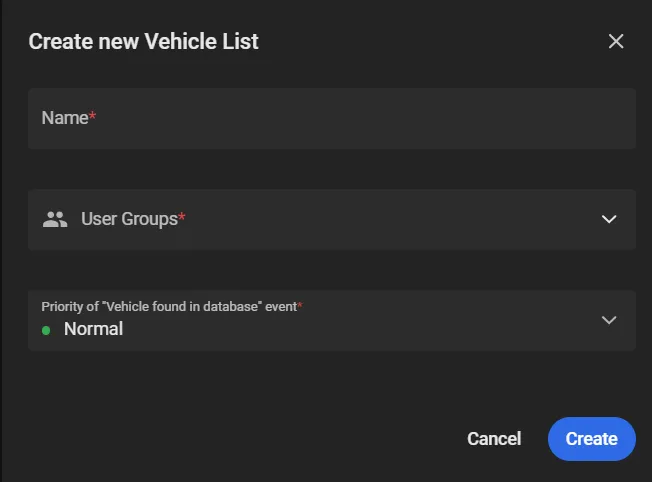
- Click the "+" in the bottom-right corner of the screen — the Create new Vehicle List form opens.
- Enter the new list name and vehicle recognition event priority.
- On the User group list, select the groups to share the list with.
How to quickly find events with vehicles on the list?
Only groups that the current user belongs to can be selected.
How to grant wider access to a vehicle list?
View and Edit a Vehicle Entry
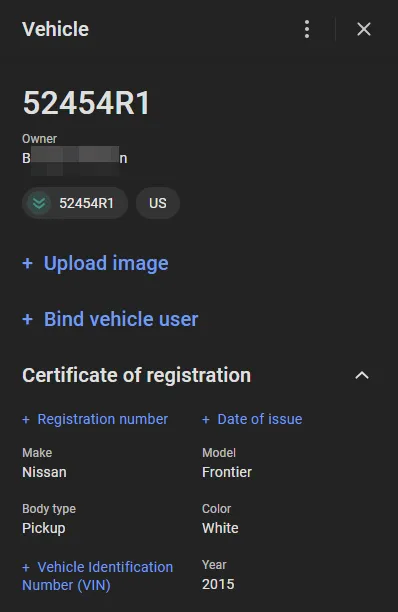
To view the details of a vehicle in the database, click its card — a sidebar opens on the right holding those details.
Click in the three-dot menu on a vehicle card:
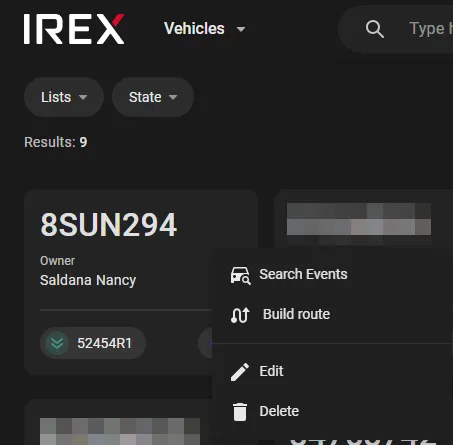
- Search events — to open the Events screen holding all appearances of the vehicle detected within the Platform instance operational range.
- Build route — to build the route of the person in the form of a broken line connecting all the vehicle appearance locations.
- Edit or Delete — to edit or delete the card, respectively.
Find a Vehicle Entry in the Database
A Case ID is required!
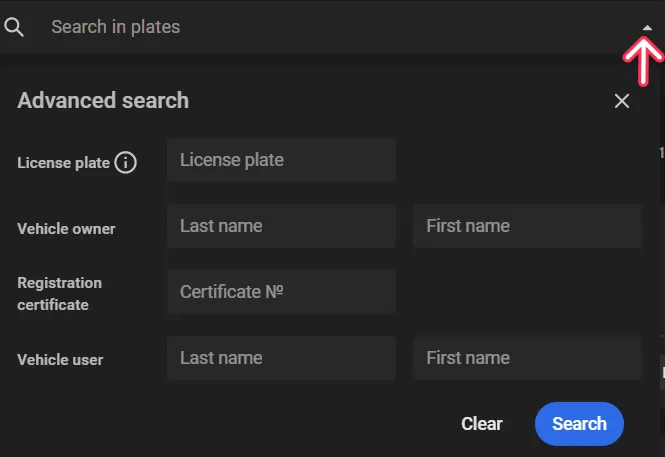
If the array of vehicle entries in the database is massive enough, use the search tool by a text attribute, such as license plate number, owner driver's license data, registration certificate, etc. To do so, click as shown in the search text box to enter these search criteria into the advanced search form that opens, and click Search.
Enroll a Vehicle
A Case ID is required!
Click the "+" in the bottom-right corner on the vehicle list page to complete the new vehicle form.
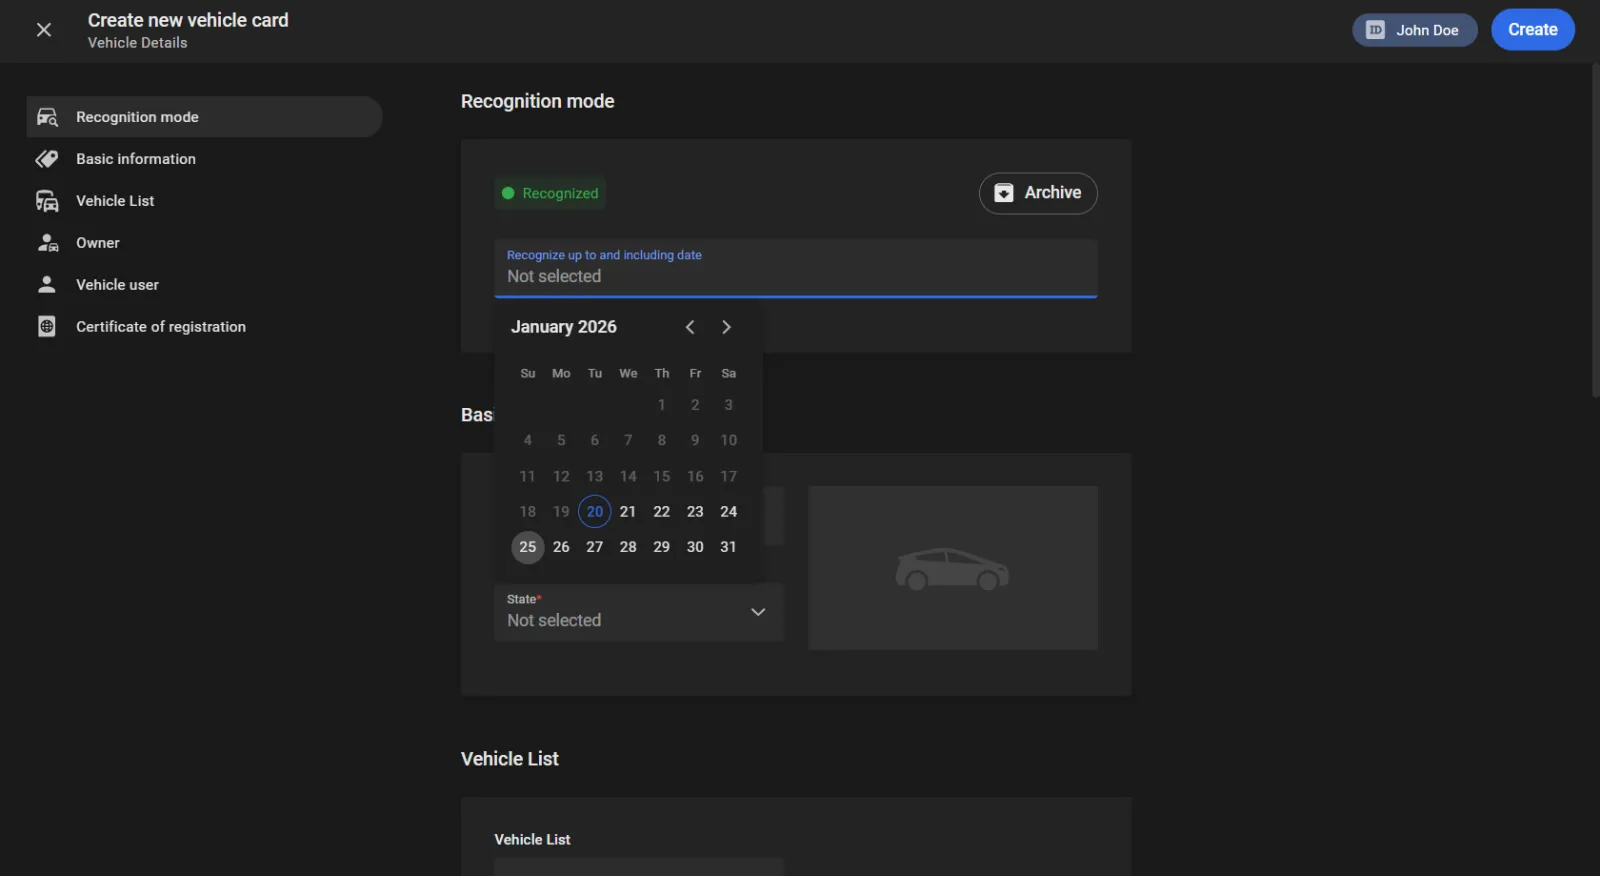
Here, click Recognize under Recognition mode to license plate recognition of the vehicle, and then set up a time window for this below. Click Archive to ban the license plate recognition. Then complete the other sections in the form and click Create.
Import of Vehicle Entries from an External File
A Case ID is required !
There is a function to import vehicle entries to a list from a TAR archive or a spreadsheet (*.csv).
Import from a TAR Archive
A TAR archive must contain:
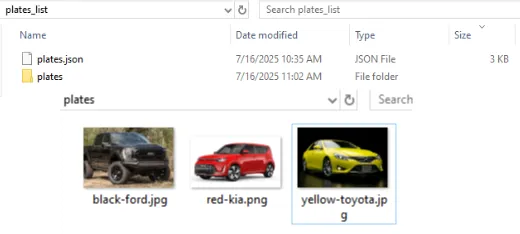
- plates subfolder containing images of vehicles.
- plates.json file containing structured JSON descriptors with all available information about the vehicles, for example:
[
 {

    "number": "9JRI205",   // Plate number
    "state": "US",     // Country code
    "owner_first_name": "John",   // Vehicle owner's first name
    "owner_last_name": "Doe",     // Vehicle owner's last name
    "image": "plates/black-ford.png //Path to the vehicle image in the plates folder

    // Optional fields go below, filled in if available


    "color": "red",    // Body color
    "model": "Soul",   // Model

    "technical_passport_date_of_issue": "2025-04-01",  //Date of issue of technical passport
    "technical_passport_number": "123456",   // Technical passport number
    "type_of_vehicle": "SEDAN",  // Vehicle's body type
    "vin_number": "1223456789",  // VIN number
    "year_of_issue": 2025,       // Vehicle production uear
    "manufacturer": "Kia",       // Car make

  },
...
]
To import a TAR archive like this:
- Ensure that the information in the plates.json file is as complete and well-structured as shown in the example above.
- Verify that the paths in the "images" fields correctly point to photo files in the plates folder.
- Open the list to import the archive into.
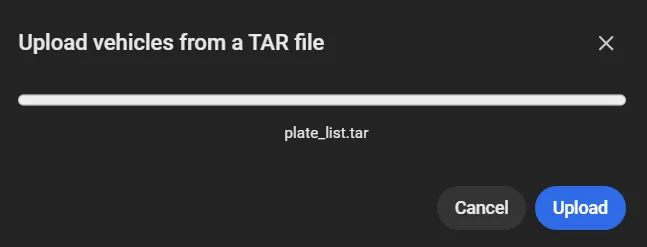
- Click Import on the three-dot menu and navigate to the archive file in the standard Open window.
- Confirm the import:
- Click Done, then refresh the page to view the newly added vehicle entries in the list.
- Check that additional vehicle information (color, car make, etc.) taken from the plates.json file is correctly displayed on the new vehicle cards.
Import Vehicle Entries from a Spreadsheet
There is a batch import function of vehicle entries into a list from a *.csv file.
The separator must be a “;”, e.g.
GF23WGN;United Kingdom;Doe;John
... i.e., the format must be:
PlateNumber;Country;LastName;Name
To do so:
- Open the list to import the entries to.
- Click Import in the three-dot menu - the standard Open window opens.
- Point to the *.csv file in this window and click Open - the import will proceed until all entries are on the list except for incorrect ones, if any.
- Refresh the page to see the new entries have appeared on the list.
- Check the plate numbers, countries, owners' first and last names displayed correctly on the vehicle cards.
Export of a Vehicle List to a TAR Archive
The reverse process of import is exporting a list into a TAR archive containing:
- plates subfolder containing vehicle photos matching those on the vehicle cards, with filenames assigned automatically.
- JSON descriptors of the personal cards in plates.json file, in which entries are like this:
[
 {
    "id": 2113     // vehicle's ID in the database
    "number": "K363CA198",   // Plate number
    "state": "AT",     // Country code
    "owner": "",
    "list": 405     // vehicle's list ID
    "image": plates/114... 4_car.png //path to vehicle's photo in the plates folder.
    "image_hash": 41f2ba5da6b9a8da4a03852f300c9228    // vehicle's image hash
    "owner_first_name": "John",   // Vehicle owner's first name
    "owner_last_name": "Doe",     // Vehicle owner's last name

    // Optional fields go below, if available.


    "color": "red",    // Body color
    "model": "Soul",   // Model

    "technical_passport_date_of_issue": "2025-04-01",  //Date of issue of technical passport
    "technical_passport_number": "123456",   // Technical passport number
    "type_of_vehicle": "SEDAN",  // Vehicle's body type
    "vin_number": "1223456789",  // VIN number
    "year_of_issue": 2025,       // Vehicle production uear
    "manufacturer": "Kia",       // Car make
    "face": 57   // Vehicle's user ID, if any

  },
  ...
]
To export a vehicle list to a TAR archive:
- Click Export on the three-dot menu on the vehicle list page; the *.json file like the one above will then be created and temporarily saved in the memory of the computer.
- Click the Download export that appears on the same menu, and select the local directory to save the archive to in the standard Save as window.