IREX
EN

General

How it works

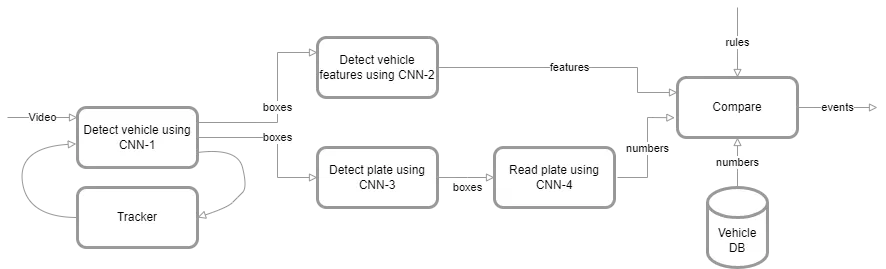
CarTrack Pro detection pipeline diagram: CNN-1 detects vehicles, CNN-2 detects features, CNN-3 and CNN-4 detect and read plates, and results are compared against the vehicle database and rules to generate events

The core elements of CarTrack Pro are neural networks (CNN) trained to execute their own task each:

  • CNN-1 detects objects of the "Vehicle" class in the incoming video stream and builds bounding boxes to pass those for further processing with other CNNs.
  • CNN-2 detects vehicle features, such as color and type (car, bus, motorcycle, etc.). For motorcycles, it can also classify the riders' protective gear.
  • CNN-3 detects license plates on previously detected vehicles to pass those to CNN-4 for plate number recognition.

The pipeline is finalized by matching the recognized plate numbers and features against those in the vehicle database and (or) checking the user-defined conditions (e.g., a vehicle in a restricted access area). Eventually, the relevant events are generated.

Camera requirements

  • Camerа mount: fixed or PTZ.
  • Resolution: from 1280x720 (HD Ready) to QHD 2592x1944.
  • Frame rate: 10-60 FPS, depending on vehicle speed.
  • Codec: H.264 HP/MP/BP
  • Net protocols: TCP/IP, ICMP, HTTP, HTTPS, RTP, RTSP, NTP, SNMP, IGMP, IPv4/v6
  • Advanced features: DNR, BLC(HLC), WDR 120dB 

Camera mount requirements

  • Image quality within the region of interest:
    • over 25 px per meter to detect a vehicle
    • over 250 px per meter to recognize a plate
  • Minimum vehicle image size: 2025 px ( 45Х45)
  • Plate image width: 80 px minimum, 125 recommended
  • Mount height:
    • 3 -15 meters above the ground level to detect a vehicle
    • 2 - 6 meters above the ground level to recognize a plate and measure speed
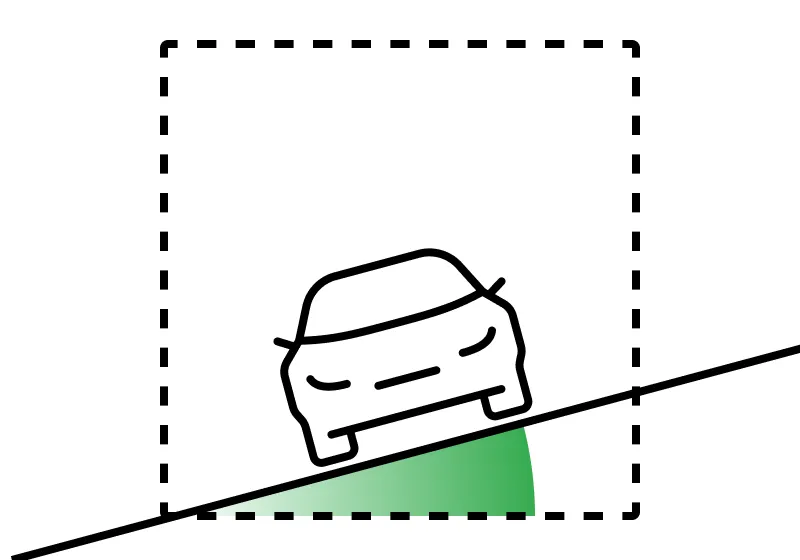
  • This ensures the camera tilt ranges from +15° to +75° for vehicle detection with no plate recognition and from 0° to+20° for plate recognition and speed measurements.
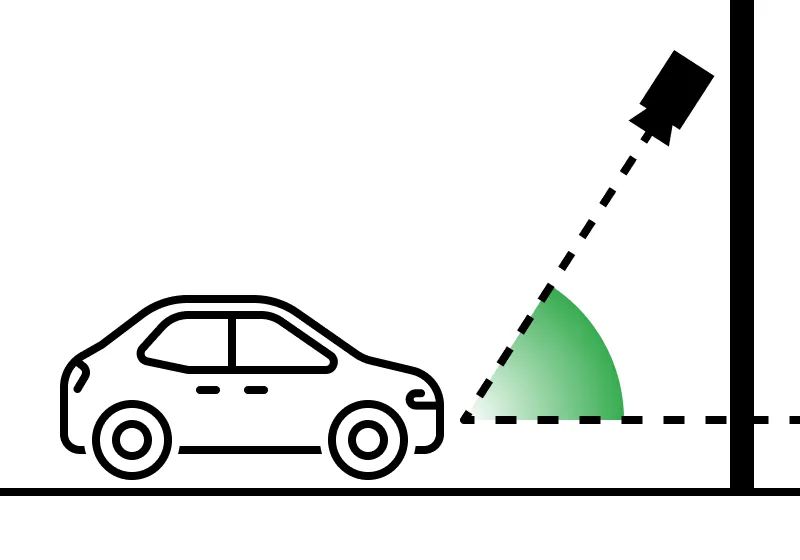
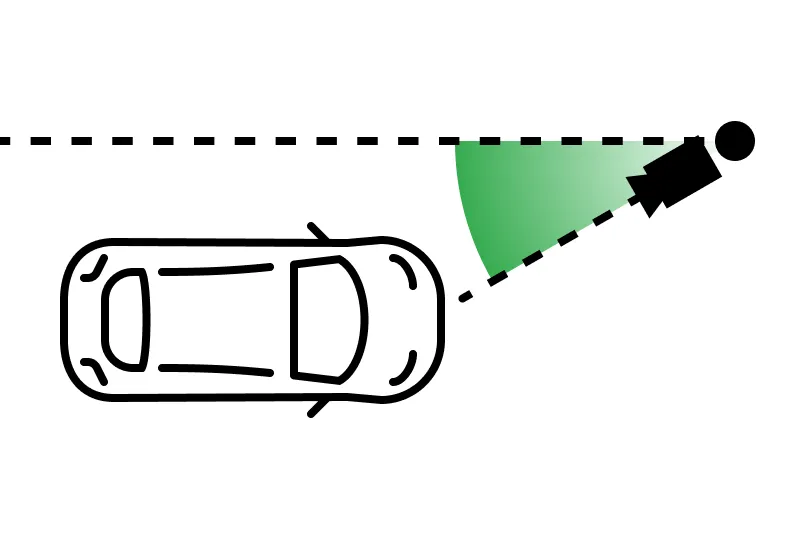
    Diagram of the camera tilt angle, measured from the horizontal to the camera's line of sight toward the vehicle

  • Pan:
    • from -75° to +75° for vehicle detection with no plate recognition
    • from -20° to +20° for plate recognition and speed measurements
  • Roll: from -5° to +5°
  • Top-down diagram of the camera pan angle, measured from the road's direction of travel to the camera's line of sight
    Diagram of the camera roll angle, showing the camera's frame tilted relative to the horizon

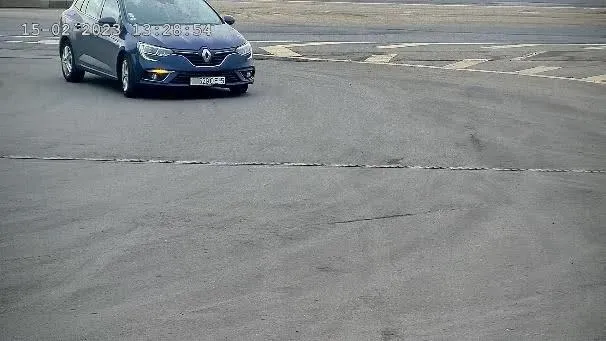
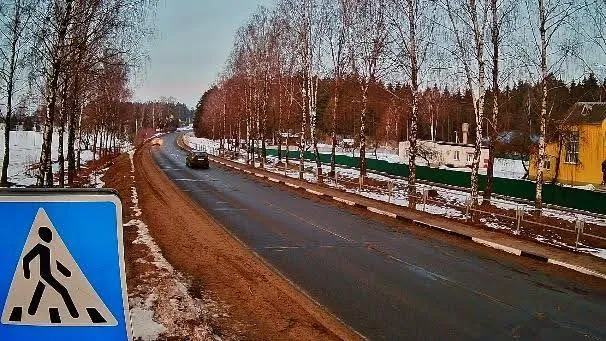
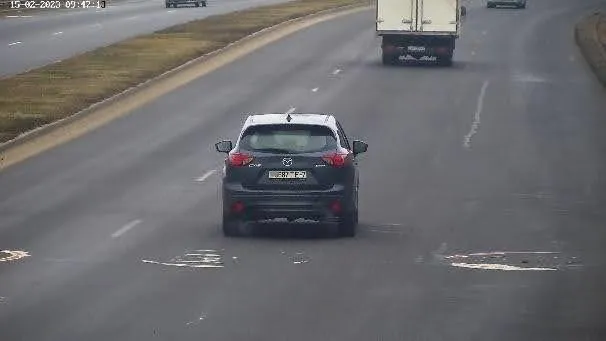
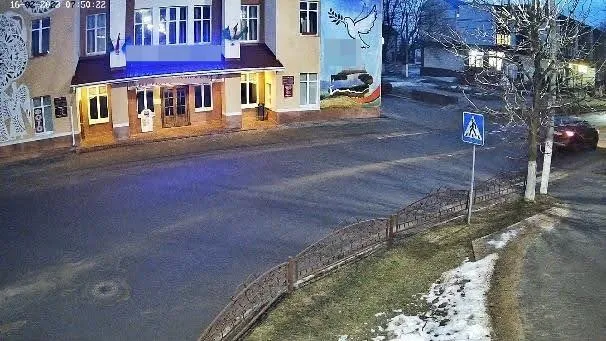
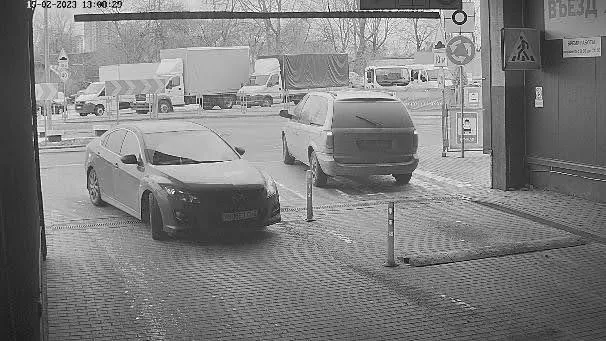
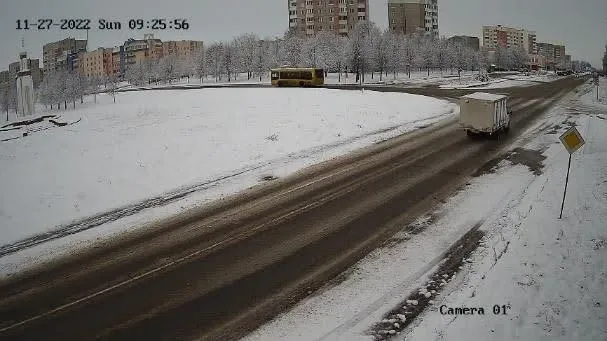
The pictures below are to illustrate good and bad camera mount locations.

Good
Bad
Good camera mount example: car approaching at close range with a large, sharp view of the front plate
Bad camera mount example: wide roadside view with the car too small and far away for the plate to be readable
Good camera mount example: elevated rear view of an SUV in a highway lane with the plate clearly legible
Bad camera mount example: low-angle night street view with no vehicle close enough to capture a readable plate
Good camera mount example: overhead angled view at a checkpoint with cars close enough for plates to be read
Bad camera mount example: wide, high-angle view of a snowy road with vehicles too distant for the plates to be read

Computational capacity

The computational complexity of the module is estimated as "High"; the exact numbers may vary with video resolution and CPU parameters.  

Export/Import settings

Export the module settings to a *.xml file, e.g., to pass it to qualified IREX personnel to find a solution to a problem with the module performance, should it happen. To do so:

  1. Find the camera running the module in the User menu — Settings — Camerasand click Video  analytics settings as shown:    
  2. Cameras list with the three-dot menu open on a camera row, highlighting the Video Analytics settings option
  3. On the VIDEO ANALYTICS tab on the camera settings pane on the left, click the three-dot menu 
  4. Video Analytics settings menu open, showing Export analytics configuration of a module and Export analytics configuration of a model options

    Export analytics configurations of the module — to export the module settings on the MAIN sub-tab.

    Export analytics configurations of the model — to export the entire module configuration, including the rules, if any.

Enable CarTrack Pro

  1. Find the camera to enable the module in the User menu — Settings — Cameras section and click Video analytics settings as shown.    
  2. Cameras list with the three-dot menu open on a camera row, highlighting the Video Analytics settings option
  3. On the <module_name> list, click the name of the module.
  4. Slide right the On/Off slider On/Off toggle switch in the on position
  5. Click Apply at the bottom of the pane.